Copper pipe repair is an unwanted but not-so-complex thing to do. When copper pipes start leaking water, it can be a very frustrating experience. In this article, you will learn how to stop leaks in your copper pipes and how to do the job quickly and efficiently with minimal tools and cost.
Check Out Our Plumbing Services
The longer the leak to persists, the more likely it will damage your house or even cause injury by flooding an area of your house that could eventually cause harm. Therefore, pipe repair is necessary, and you cannot sit idle and wait for the plumber to come and fix it for you, but you have to do something to control the instant damage.
Copper Pipe Leak Repair Methods
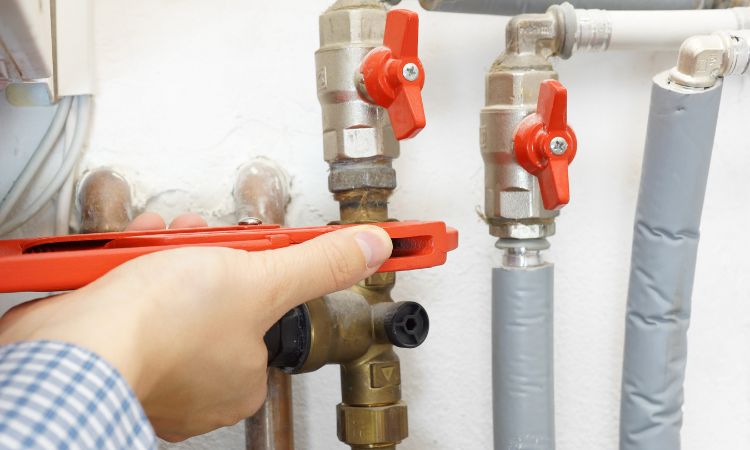
When a copper pipe starts leaking, you cannot use the water in your house. When you open the water supply valve, the leaking pipe will not take much time to make a pool around you. That is why a commoner must understand the basic repair techniques to minimize the damage. Here are a few techniques for emergency copper pipe repair.
1. Copper Pipe Repair Coupling
This coupling technique is the most common technique of pipe repair, and most people like to use it. But it is important to note that this method requires soldering. It would help if you had two couplings and a piece of pipe to initiate this process.
Firstly, you need to cut the damaged pipe area using a pipe cutter and deburr the inside of the pipe. Now measure the length of the pipe that you need to replace. You will also need a repair coupling without a stopper. With the help of this coupling, you will be able to slip the new pipe into the slot. Pull the coupling back onto the pipe, ensuring that both pipes meet in the middle of the coupling, then proceed to solder.
2. Use of Compression Fittings
The compression fittings are made out of 3 components, the fitting, a copper pipe repair sleeve, and a retainer nut. When you screw the retainer nut, the sleeve is squeezed between the fitting and the pipe.
In this way, a leak-free joint is completed. To install them, cut out the damaged area using a pipe cutter. After cutting and deburring, you will need to measure the length of the new pipe and install it in the open slot.
3. Shark Bite Slip Coupling
If you are unfamiliar with soldering and need to repair your copper pipe, shark bite coupling is the best repair method for you. After turning off the water supply, you need to cut and deburr the damaged area of the pipe.
After, identify the Slip-end of the fitting and insert it onto the pipe until it clears. The other end uses an adjustable wrench to push it in till both marks are visible and the repair is done.
4. Emergency Pipe Clamps
Emergency pipe clamps are available in no-toxic and resilient material in the market. These clamps hold the leaking pipe point and do not allow the water to pool out of the pipe.
Installation of pipe clamps is an easy and less expensive method. However, you cannot keep this clamp for a long time because it is for a short duration till your plumber arrives.

5. Soldering the Hole
Soldering the hole shut is not a code-approved yet effective method. If a tiny pinhole appeared on your copper pipe, soldering might help you block the leak. The first thing is to turn off the water supply and drain the existing water from the system.
Then, clean the pipe using an abrasive pad, add some flux and slowly heat the pipe; you’ll see the flux begin to alter colour, add some solder onto the hole; it should temporarily block the leaking point of the pipe.
6. Use of Wire
Copper wire, mainly utilized in electrical wiring, is wrapped around the copper pipe to cover the leaking point. Afterward, we solder the wire on the leaking point to complete the fixing process.
You can use pliers to help you wrap the wire around. It is essential to know that this method is not code-approved.
7. Use of Alfa Tape
Alfa tape is a tape made of a non-toxic chemical to cover the leaking points. You could sell it just for first-aid, and it should temporarily seal the pipe.
8. Use of Epoxy Putty
This method uses an epoxy-saturated cloth that, when applied, will cover a leak or burst on a pipe or a fitting. First, kneed the epoxy putty so that parts A and B adequately mix.
Then apply it on the burst as such while making sure to taper both extremities. Then, soak the cloth in water for about ten to fifteen minutes while keeping the tension on it. Wrap this cloth around the putty and allow it to harden. However, this is also a temporary solution; you should not rest on this method for a long time.
Conclusion
Copper pipe repair is a challenging yet exciting task. Copper pipe leaks start pooling water on the floor and everywhere if not taken seriously. You should enhance your knowledge of some techniques to repair a burst or leaking pipe.